Saturday, November 12, 2011

Recipe Chain Blog

I remember my freshman year of college with me and my roommates would each take a night cooking dinner that way we would have a great home-cooked meals. It was so fun and we got to try everyone's best meals! I propose we do a Recipe Chain Blog. I will go first with a few of my go-to meal and I can't wait to see the fabulous meals from others!

               Chicken-Pineapple Fajitas
  Ingredients
  • 2 pounds boneless skinless chicken breasts, cut into strips
  • 1 tablespoon olive oil
  • each medium green, sweet red and yellow pepper, julienned
  • 1 medium onion, cut into thin wedges
  • 2 tablespoons fajita seasoning mix
  • 1/4 cup water
  • 2 tablespoons honey
  • 1 tablespoon dried parsley flakes
  • 1 teaspoon garlic powder
  • 1/2 teaspoon salt
  • 1/2 cup unsweetened pineapple chunks, drained
  • 8 tortillas (10 inches), warmed

Directions

  • In a large nonstick skillet, cook chicken in oil for 4-5 minutes. Add peppers and onion; cook and stir 4-5 minutes longer.
  • In a small bowl, combine seasoning mix and water; stir in the honey, parsley, garlic powder and salt. Stir into skillet. Add pineapple. Cook and stir for 1-2 minutes or until chicken is no longer pink and vegetables are tender.
  • Place chicken mixture on one side of each tortilla; fold tortillas over filling


Quinoa and Black Beans


INGREDIENTS:
1 teaspoon vegetable oil
1 onion, chopped
3 cloves garlic, peeled and chopped
3/4 cup uncooked quinoa
1 1/2 cups vegetable broth
1 teaspoon ground cumin
1/4 teaspoon cayenne pepper
salt and pepper to taste
1 cup frozen corn kernels
1 (15 ounce) cans black beans, rinsed
and drained
1/2 cup chopped fresh cilantro


DIRECTIONS:
1.      Mix quinoa into the saucepan and cover with vegetable broth. Season
with cumin, cayenne pepper, salt, and pepper. Bring the mixture to a
boil. Cover, reduce heat, and simmer 20 minutes,
2.      Heat the oil in a medium saucepan over medium heat. Stir in the
onion and garlic, and saute until lightly browned.
3.      Stir frozen corn into the saucepan, and continue to simmer about 5
minutes until heated through. Mix in the black beans and cilantro.

Sunday, October 23, 2011

Massage Candles


     After seeing these for about $17 bucks I wanted to see how hard it would be to make them myself, and it's actually super easy so here is the recipe:

  • 3oz Soy Wax
  • 1oz Sweet Almond or Jojoba Oil (sweet Almond oil is cheaper and I love the smell)
  • 1/2 teaspoon Vitamin E (or 2 capsules)
  • 30 drops Essential Oil (see below for blends)
  • 4oz candle tin or jar
  • Pre-tabbed Candle Wick

Directions

  1. Prepare your candle tin or jar by fixing the candle wick to the bottom of the tin. (You can use glue tabs or a bit of hot wax to hold it in place. I generally just press it down really hard.)
  2. Put about an inch (2.5cm) of water in the bottom of a medium-sized pot and heat to a low simmer.
  3. Place the soy wax in a large heat-proof glass measuring cup (such as Pyrex.) Place the measuring cup in the water and warm slowly over a low heat until the wax is melted.
  4. Pour in the oil, stirring slowly to mix. Don't stir too quickly or you'll end up with air bubbles in your massage oil candles.
  5. Remove from the heat and gently stir in the Vitamin E. Drop in the essential oils and stir some more.
  6. Slowly pour the hot candle massage oil into the tin, making sure the wick stays centered.
  7. massage oil candles
  8. Let cool and harden for several hours, then trim the wick to about 1/4 inch (1/2cm). That's it, you're ready to go!


Scenting Your Massage Oil Candles

Here's some fun, soothing, delicious essential oil blends for your massage oil candles. Pick your favorite or try one of each!
  • Citrus Rush. 7 drops each bergamot, grapefruit, lemon and orange, 2 drops jasmine, rose geranium OR ylang ylang
  • Fire & Ice. 20 drops Peppermint, 5 drops bergamot, 3 drops eucalyptus, 1 drop ylang ylang
  • Lavender Spice. 25 drops lavender, 2 drops clove, 1 drop vetiver, ginger OR cinnamon
  • Rose Dream. 12 drops rose absolute, 2 drops rose geranium, 2 drops palmarosa OR sandalwood
  • Silk Road. 20 drops sandalwood, 4 drops orange, 3 drops patchouli, 1 drop each black pepper, vetiver and ylang ylang
  • Sweet Sensuality. 3 drops jasmine, 2 drops black pepper, 1 drop ylang ylang (these essential oils are VERY strongly scented, so you need fewer drops than other blends)

hot oil massage

To Use Your Massage Oil Candle

To use your massage candle, light the candle and wait for the wax to pool. Then either pour the melted wax into your hand or straight onto the skin.
If that's too hot for you  blow out the candle and let it sit for a minute or two, then pour or scoop the warm wax into your hand and use from there.

You can use as much or as little of the candle as you want. Any pooled wax you don't use will re-harden so you can melt it again next time. Yay!

You can buy all of the supplies online, at a store called Candlewic.com. Or you can grab them at JoAnn's or Michael's (use a 40-50% off coupon on the soy wax) 

Monday, October 17, 2011

Don't Worry...Be Happy :-)


Sounds easy right? Ok being happy all the time is only for the amazingly optimistic, or maybe for the super self-medicated. I am such a nervous & uptight person that it is truly ridiculous! Not worrying is something that I have to work on day by day, hour by hour, & minute by minute. 
Things that make me happy:


Playing/cuddling with my dog:

Working out, especially with good friends:

Going on vacation, and if you don't have enough money to go right now then planning the perfect one is half the fun anyways. Check out http://www.cheapcaribbean.com/

Eating out (I am working on making it more of a reward than a habit):


Doing something for someone else (like baby-sitting, or finding a pup a good home):


 Trying something new like making a doggie birthday cake:


Post below things that make you happy:

Wednesday, October 12, 2011

Wine, Cheese, & Chocolate Party

   Dave and I loved decorating and setting up for the party, and the company was even better. Here is what it looked like:


Here is a good idea for pairings:

Chocolate Pairings

     White Chocolate with White wine, Moscato, Zinfandel

     Milk Chocolate with Pinot Noir, Merlot, Rieslings, Muscats, Sparking Wines, Port,

     Dark Chocolate with Cabs, Zinfindales, Carbernet Sauvignon, Pinot Noir, Merlot, Port

Cheese Pairings

     Brie with Sweet Sherry, Merlot, Sherry

     Bleu D’Auvergne-Port

     Cheddar (sharp)-Cabernet, Sauvignon Blanc

     Emmentaler-Beaujolais, Red

     Gouda and Monterey Jack-Riesling

    Parmigiano-Chardonnay

    Taleggio-Pinot Blanc, Muscato


 Look how amazing everyone looked!


Friday, October 7, 2011

Cake Pops


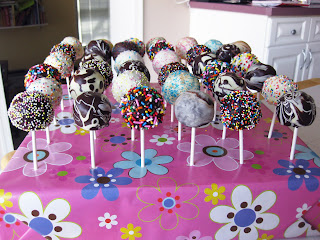
I really wanted to have a fun activity for the girls-group that I do at work every other Thursday and this Thursday we did cake pops. They turned out way better than I expected here is how we did it...

Start out by just baking a cake! I also baked brownies because I wanted to try making the same kind of thing but with brownies. I want to try it next with cookie dough, or maybe cheesecake. 


Next you have to let it cool, one the cake has cooled down add about 1/2-3/4 cup frosting. Don't add too much frosting, add just enough to the point where the cake is sticky, but not mushy. Then roll them into balls and stick them on a baking sheet lined with wax paper...

Next stick in the lolipop stick that you can get from any craft store near the cake baking & decorating section they are about $5 bucks, or save $2.50 by grabbing a Michaels or JoAnns coupon.


We didn't have time to do this step but put the balls in the fridge or freezer for a bit to let them harden. Then melt some milk or white chocolate bark, chips, or whatever you want that will melt in the microwave. 


Now here is the fun part where you get to dip your cake pops into chocolate and decorate...


Lastly put the cake pops into styrofoam and wrap them if you want to keep them looking pretty. We just ate them though!


In the future I want to try and make some as cute as these:


Wednesday, October 5, 2011

First Blog Ever!

Ok boys & girls, I have never made a blog before but here we go! So I created this blog so I can keeping a running track of the things that I am learning everyday, and hopefully be able to share some of that with my friends and family.